My cheesecake history
I have been cooking cheesecake for over 10 years. During this time I have experienced cracking, sinking and burned surfaces. After learning the methods to resolve all of these issues, I now know how to cook the cake with perfection and this is how I do it.
There are three types of cheesecakes you can make. Chilled, gelatin, or baked. I favor the baked version every time because the taste the nicest and creamiest you can get in a cheesecake, without forgetting the lovely fluffy texture that comes with baked versions.
Because this is baked, being cautious not to burn the cake cannot be expressed enough. Without any protection around the cake you will likely risk burning it around the edges and cooking the cake in the center may lack the required heat.
If you can get this right, you will not need another cheesecake recipe again. If your friends like cheesecake they will love this.
The secret to cooking cheesecake.
Cheesecake tastes nicer over time. This gives the chance for the sugar and fat to bind together to make it more delicious. Try to make the cheesecake at least a day before if possible. Plenty of time is needed to let the cheesecake settle.
Like a lot of food cooking, the process is made more effective and easier by preparing food and ingredients. Cheesecake is no exception here and there is one main thing you need before you place your ingredients out for your cheesecake.
The water bath.
The tin for the cheesecake is in a baking tray of water, lined with parchment to prevent it sticking, and is wrapped in a single piece of foil to stop water getting in. As the water heats, the oven fills up with steam. The foil stops the heat burning the edges of the cheesecake and the steam helps to regulate the cake by not drying it out to burn so you also get a good even distribution of cooking throughout the cake. This prevents cracking when cooling, prevents burning and also aids in cooking the cake evenly throughout.
Lets get started
So what do you need?
For the base
75g/3oz digestive biscuits
40g/1½oz butter
25g/1oz demerara sugar
For the filling
50g/2oz butter, melted
175g/6oz caster sugar
450g/1lb full fat cream cheese (or 2 regular sized boxes)
25g/1oz plain flour
1 teaspoon of vanilla essence
3 eggs, separated
150ml/5fl oz double cream, lightly whipped
For the topping
150ml/5fl oz double cream, whipped
A bag of frozen fruits.
150g / 1/2 cup of sugar
The Base
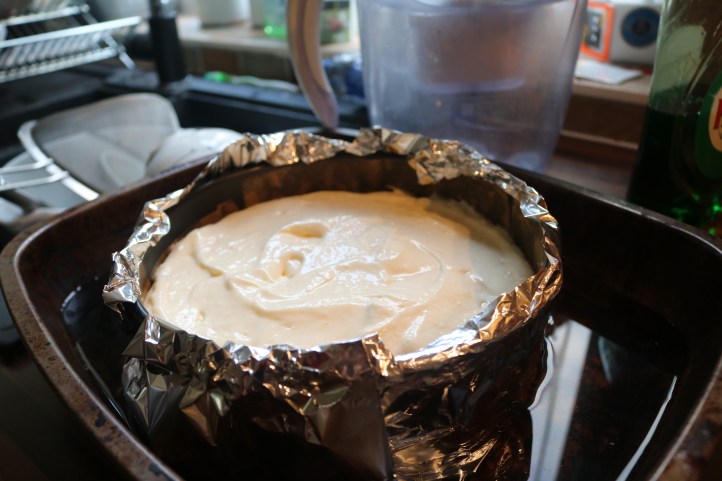
Well first of all you need a baking tin for the cake, lined with cooking parchment or paper and you need a baking tray which is big enough to fit the tin in. I use between 9 and 11 inches for the cake tin which fits nicely into my large baking tray. Wrap a large piece of foil around the tin, fill the tray 1/4 with water and place the tin in and make sure no water leaks through.
Next you need a large bowl and about 10 digestive (just under half a pack) biscuits. Crush the biscuits up with a spoonful of demerara sugar. Melt a tablespoon or 2 of butter in a pan and pour it into the biscuit mix.
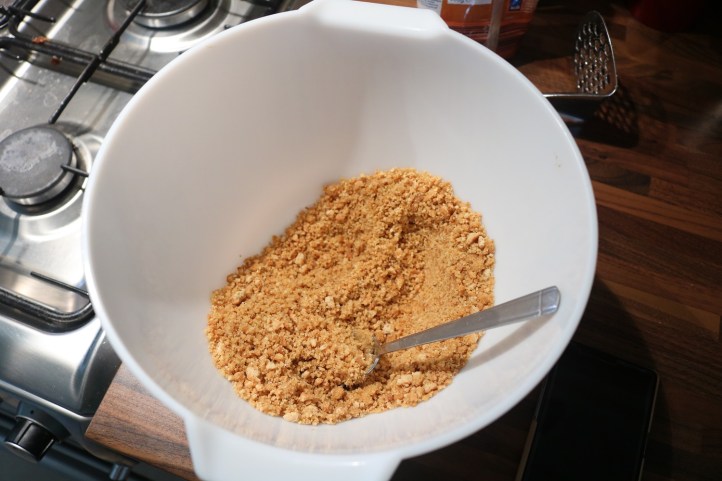
Mix this up and then pour it into the tray you created earlier. Press it down so it is nice and compact and even.

Turn on the oven to gas mark 3 or 150 degrees.
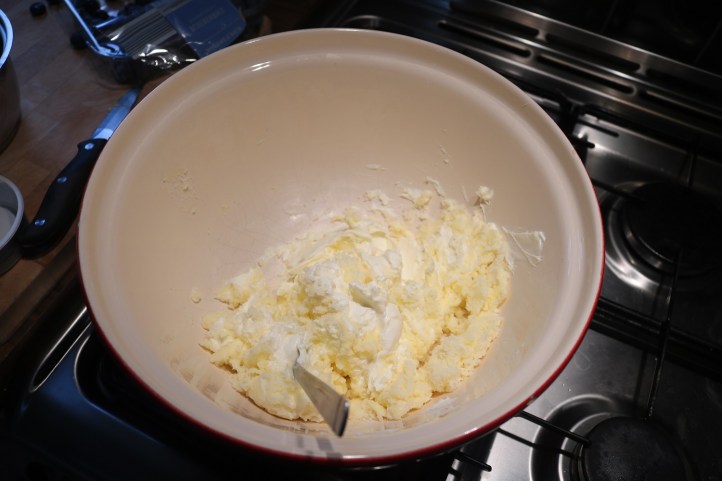
Next we take 2 x 200g of full fat soft cheese, 175g of caster sugar and mix and mix it together in a large bowl.
Next take 3 eggs, and separate them. Put the yolk of the eggs into the cheese mixture and stir in. Add in a teaspoon of vanilla essence, or flavouring. Add in about 50g of melted butter and make sure this is mixed in well.

Take the white of the egg and whisk until it is just stiff. Leave the egg there for a minute and get 150ml of double cream and place this into a bowl and whisk for about 30 seconds. Sieve and add 25g flour to the cream until the cream gets thick.
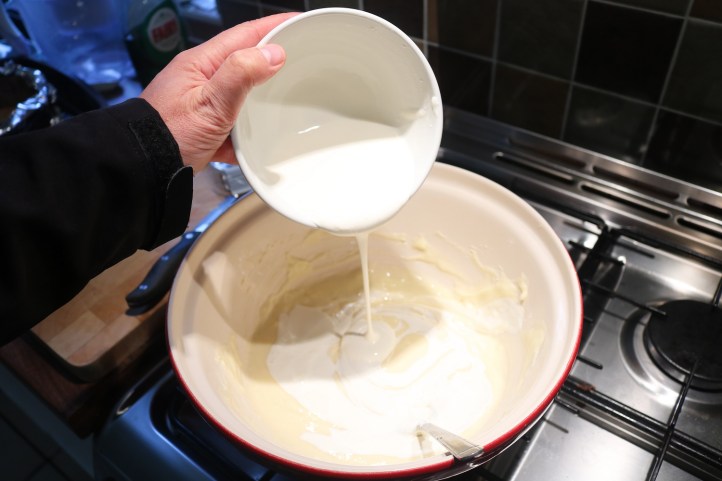
Pour this into the mix and stir gently, making sure its incorporated well.
Next add the egg white and fold this into the mix.

Don’t mix too much because we want to make sure the air stays in the mixture. When you have done this, pour it into your baking tin and place in the centre of the oven (not at the top).
Now depending on your oven efficiency you want to cook the cheesecake between 50-60 minutes. Check the cheesecake for the “wobble”. Open the door and knock the tin gently and if it wobbles and starts to look golden on top then it is ready. The cheesecake should be slightly brown on top. If it gets burned, you may want to consider adding more water to the tray.
Do not remove the cheesecake from the oven.
If after 60 minutes it is done, turn off the oven. Leave the cheesecake in there for at least an hour to cool. If you get it out and cool at room temperature the cheesecake will crack. If you need to leave it in for longer then giver it 5 minute intervals and check until done.
Once it has cooled and after an hour you should be able to take it out. If you are not sure then leave it for a few hours then take it out.
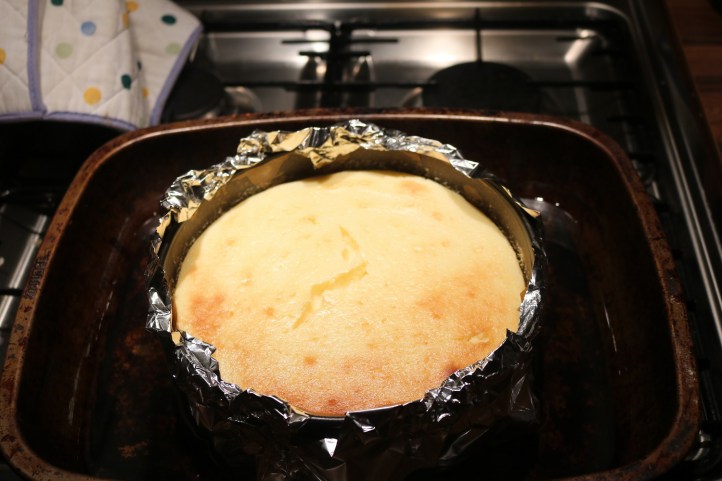
As you can see here, after an hour you still get a little cracking. Take it out of the tray and leave to cool at room temperature for a few hours then transfer to the fridge. Once it is cool you can take off the foil and extract from the tin.
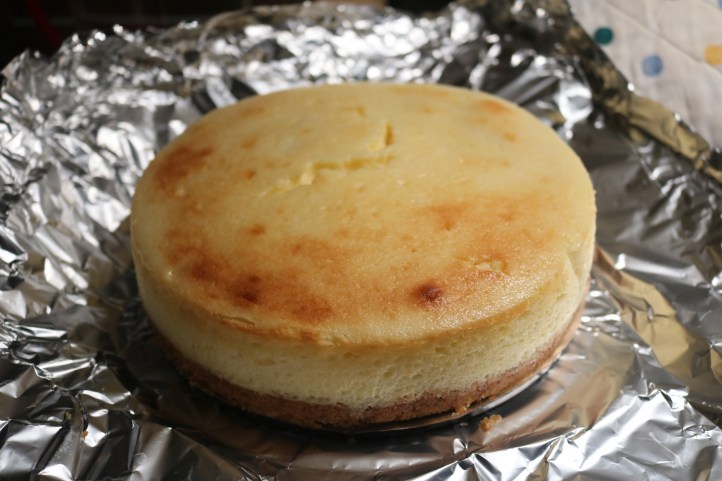
If you can, transfer from the tin base to a flat plate. If you placed some parchment at the base of the tin, if the cake is cold enough you should be able to lift the cake up with a large spatula or something with a large surface area, and slide the paper off the base.
The Topping
There are 2 sections for the topping.
- The cream
- The fruit
Get about 150g of berries (in this case I used strawberries). Any type will be fine, or a mixture is OK too. Place them in a pan, turn up the heat, add about half a cup of sugar and watch them caramelize. Try not to burn them, as soon as they start to boil turn it down to simmer.
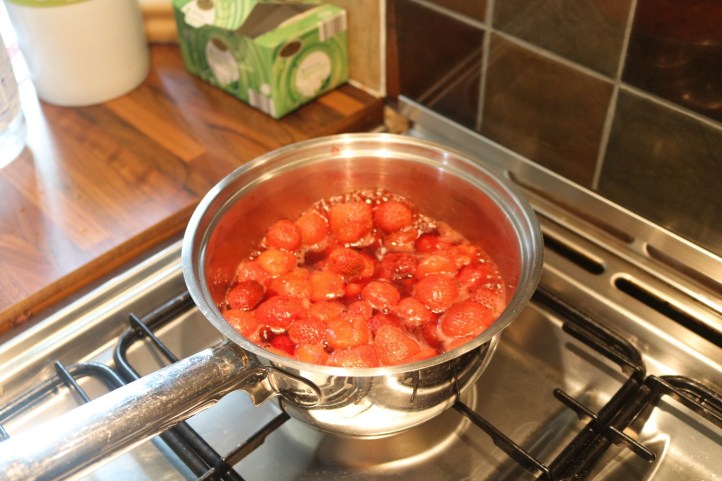
After about 45-60 minutes, turn off the heat and leave to cool. Once they are cool then place them aside.
When the cheesecake is cooled, then take it out of the fridge. Take another 150 ml of double cream and whisk it until it is thick. Use this cream to spread over the top of the cheesecake. If the fruit is still warm then place the cheesecake in the fridge.
Once the fruit is cold, you can transfer this to the cheesecake.

Place in the fridge until you are ready to serve. Keep for up to 5 days in the fridge.
Enjoy.

This looks sooooo good!
LikeLiked by 1 person
It is and thanks 😀
LikeLike